Watermark Template User Guide
Details

| Name | Description |
|---|---|
| Author | Max Keller |
| Reviewer | Ellis Douglas |
| Name | Watermark Template User Guide |
| Version | 1.0 |
| Categories | [doc][wex] |
1. Overview
This guide explains all the necessary information to create SVG templates which are used in the WEX Watermark Extension. Tools used in this guide are:
- Inkscape (SVG Editor)
- Sublime Text (Text Editor)
- Watermark Manager (Windchill Extension)
2. What is a Watermark Template
A watermark template is essentially one or more SVG files that define the watermark layout. Each svg file is initially defined to target a specific paper size but, since svg files are scalable, a single svg can be used for multiple different paper sizes.
2.1 Local Templates
A local template is a template that has been created through the Watermark Manager page. This template lives in the Windchill filesystem and is mainly used during the development process. Use Watermark Manager to create, update,delete and export local templates. Local templates do no support clusters.

2.2 Extension Templates
A extension template is a template that has been exported using Watermark Manager and is delivered in the form of a WEX. Installing the template extension will make the template visible in the Watermark Manager page. This type of template is not editable, but it can be downloaded.

3. Creating a Template
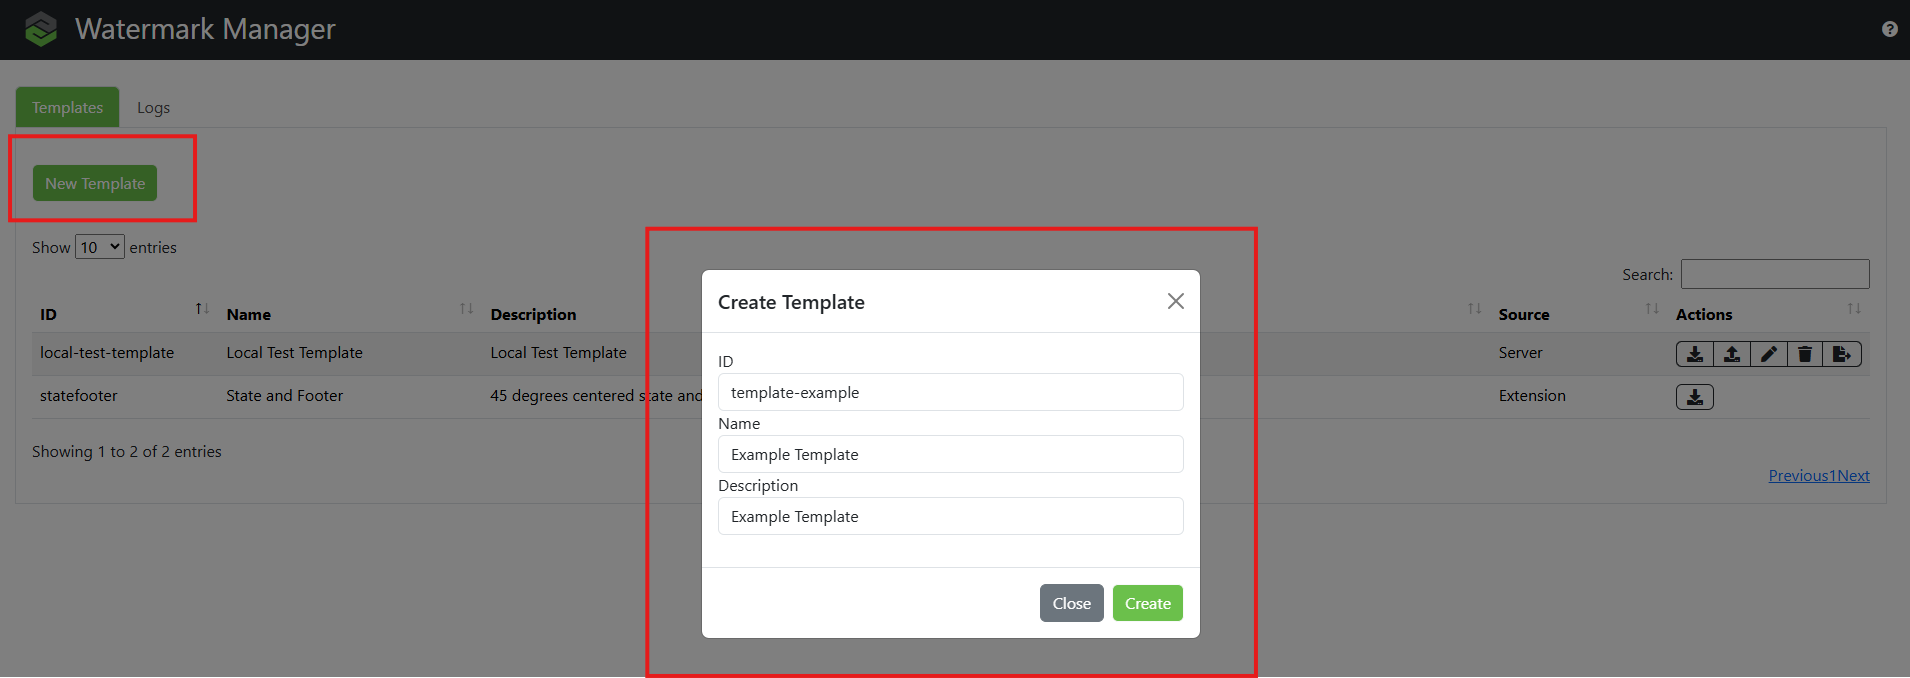
Template are managed by the Watermark Manager extension in Windchill. To create a brand new template, access Watermark Manager page through Windchill’s Quick Links tab. To create a template, click the New Template button and populate the template creation wizard. As per our naming convention, the template id must only contain letters and numbers without any spaces or special characters.
4. Editing a Template
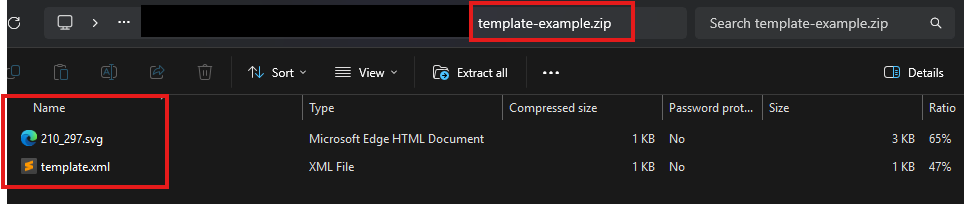
Once a template is created it will be displayed in the Watermark Manager Templates tab. Use the download button to download the newly created template content and start editing it. The newly created template contains a single SVG file called 210_297.svg which targets A4 paper size and the template.xml file which defines the metadata information of the template (id, name and description).
To edit an SVG template we recommend to use an SVG Editor, such Inkscape (https://inkscape.org/), which is open source.
Images below shows the default content of a new created template:
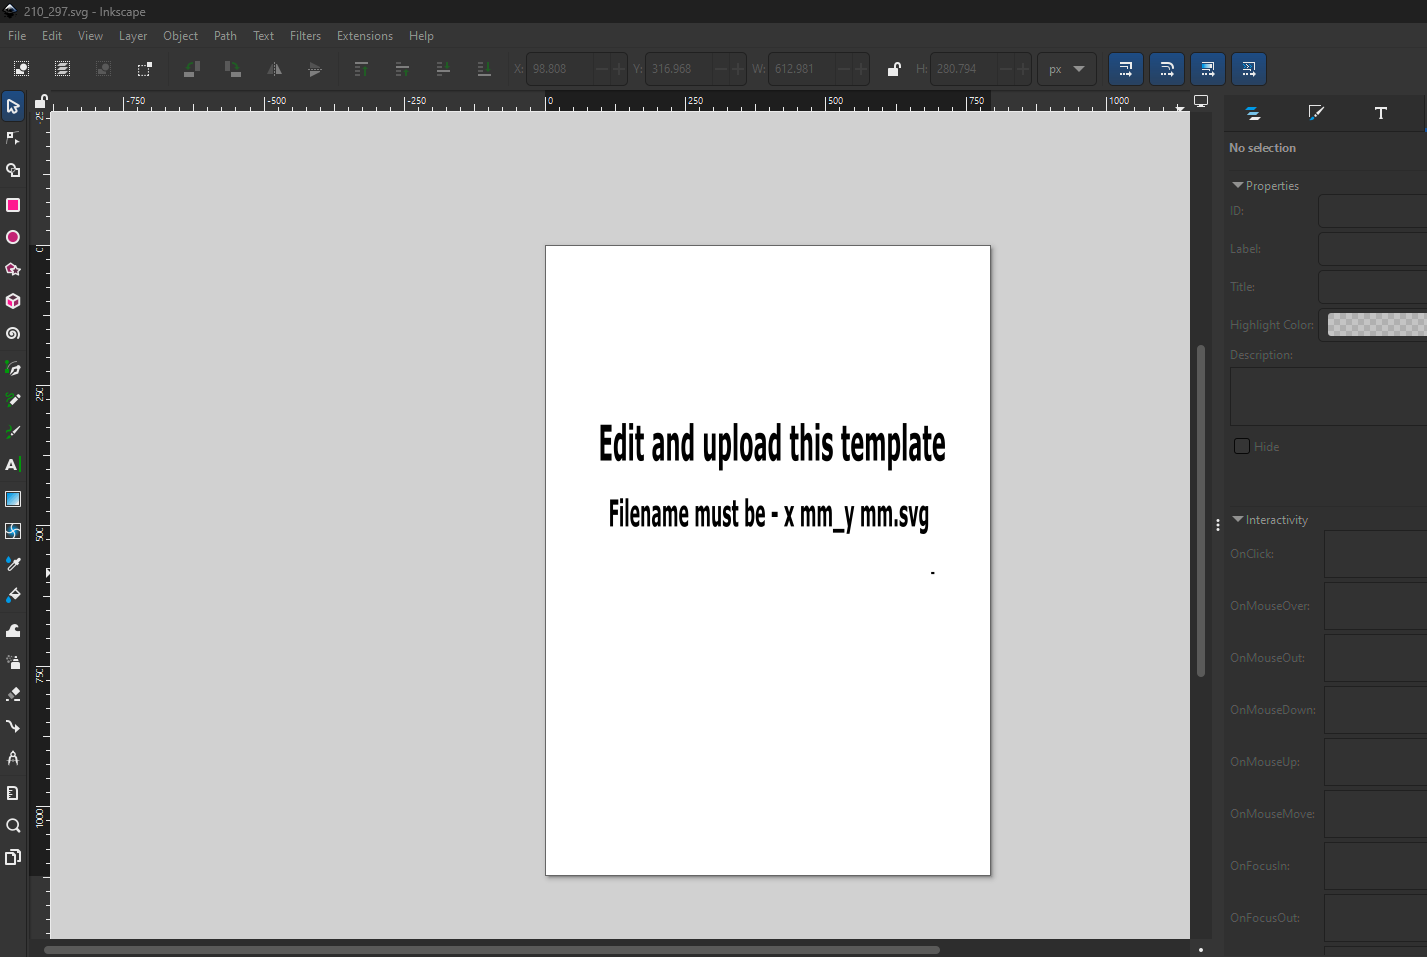
Remove the text and add your own content.
4.1 Uploading a Template
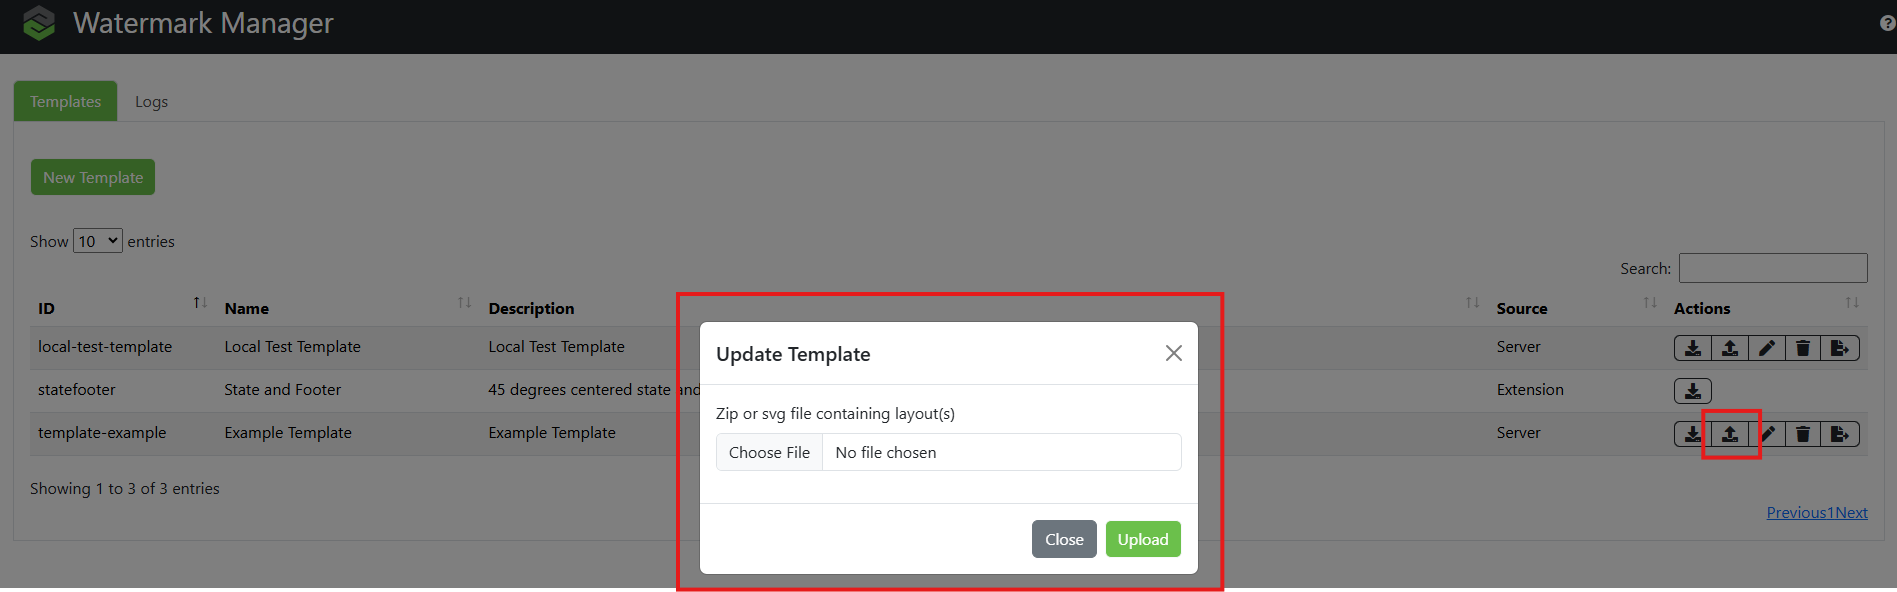
After the template svg file is edited, it needs to be uploaded back into Windchill. Watermark Manager allows you to update an existing template by either providing a single svg file or a zip file containing all the templates. Both options use the same workflow. Go to Watermark Manager and click on the upload button for the specific template you wish to update.
4.1.1 Uploading a Single SVG to a Template
When uploading a single SVG file, the SVG file will be added to the template. If the template already contained an SVG file with the same name it will be overwritten by the new uploaded version.
4.1.2 Uploading a Zip to a Template
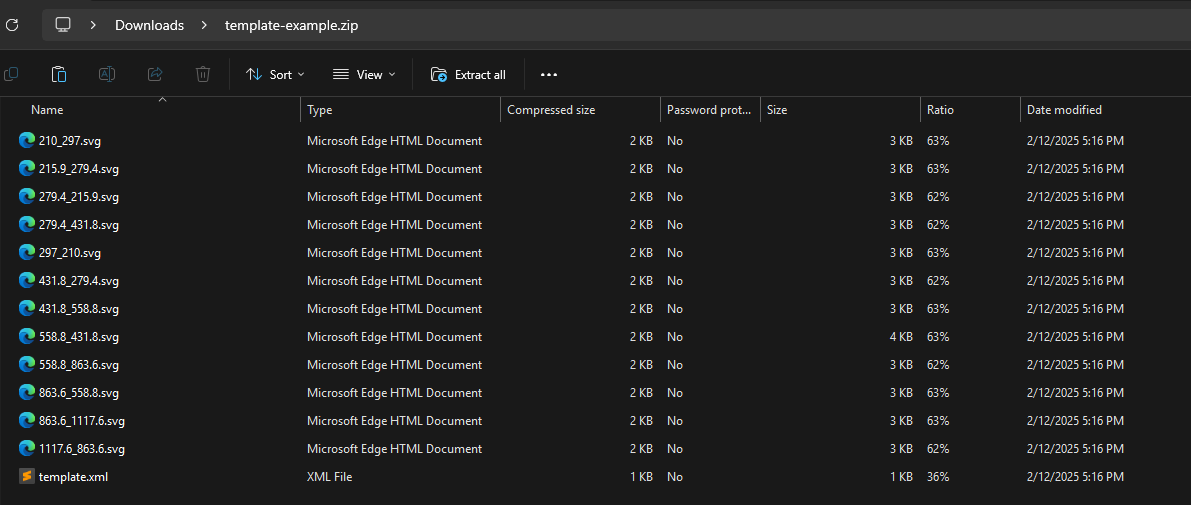
When uploading a zipped template, the template contents will be replaced with the content of the zip. This means that any existing svg files that exist on the template in Windchill but are not present in the zipped template will be removed. The svgs files must be in the first level of the zip.
4.2 Configuring Template Size
As mentioned before, by default each SVG file targets a specific paper size. Watermark uses the name of the svg file to detect the paper size the svg was created for.
4.2.1 SVG File Naming Convention
The naming convention for any svg file is <width>_<height>.svg where both width and height is specified in milimeters (mm). SVG files that don’t follow this naming pattern will not be taken into consideration by the watermark engine when resolving what SVG file should be used.
4.2.2 Configuring SVG Size
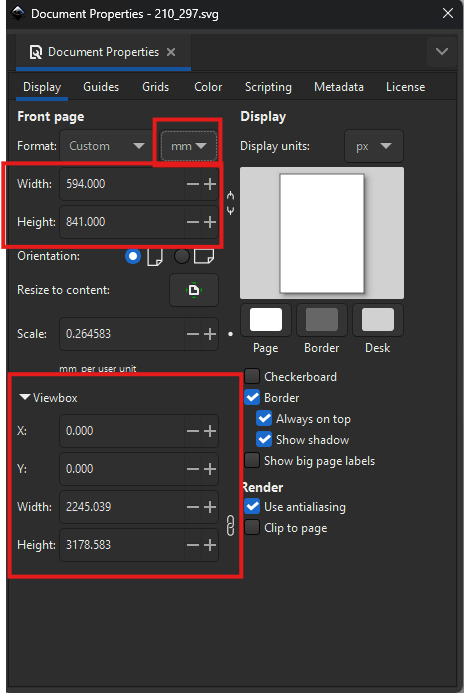
The previous section shows how to tell the Watermark engine what papersize a specific SVG file is targeting. Nevertheless, the svg file needs to define the width, height and viewbox properties accordingly. To do so, open the svg template in Inkscape, right click on the document and open Document Properties windows.

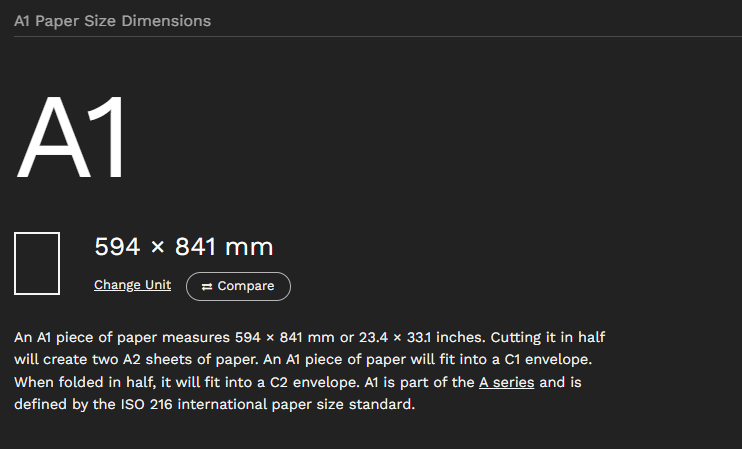
In this example, we will create a template for A1 paper size. You can use https://papersizes.io/ to check information for each papersize.
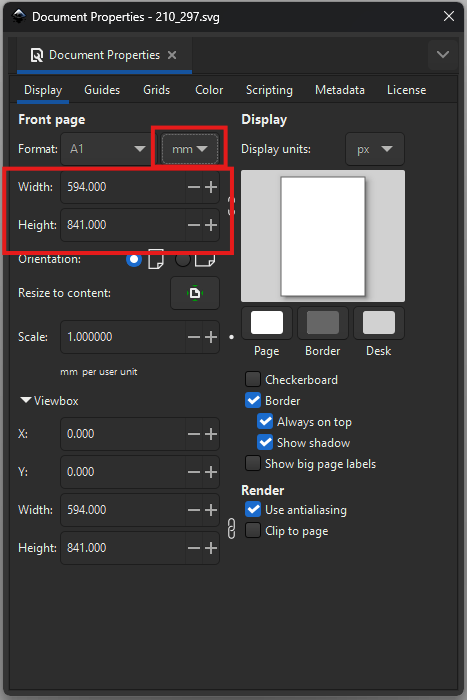
Setting Width and Height properties:
First, set the measurement system to milimeters (mm) and set Width and Height properties of the template.
Setting Viewbox properties:
Since fonts are measured in pixels and not in milimeters, the viewbox of the SVG needs to be defined in pixels and not in milimeters. To do the conversions, you can multiply the previously set SVG Width and Height by 3.78 and use those values for the Viewbox width and height properties.
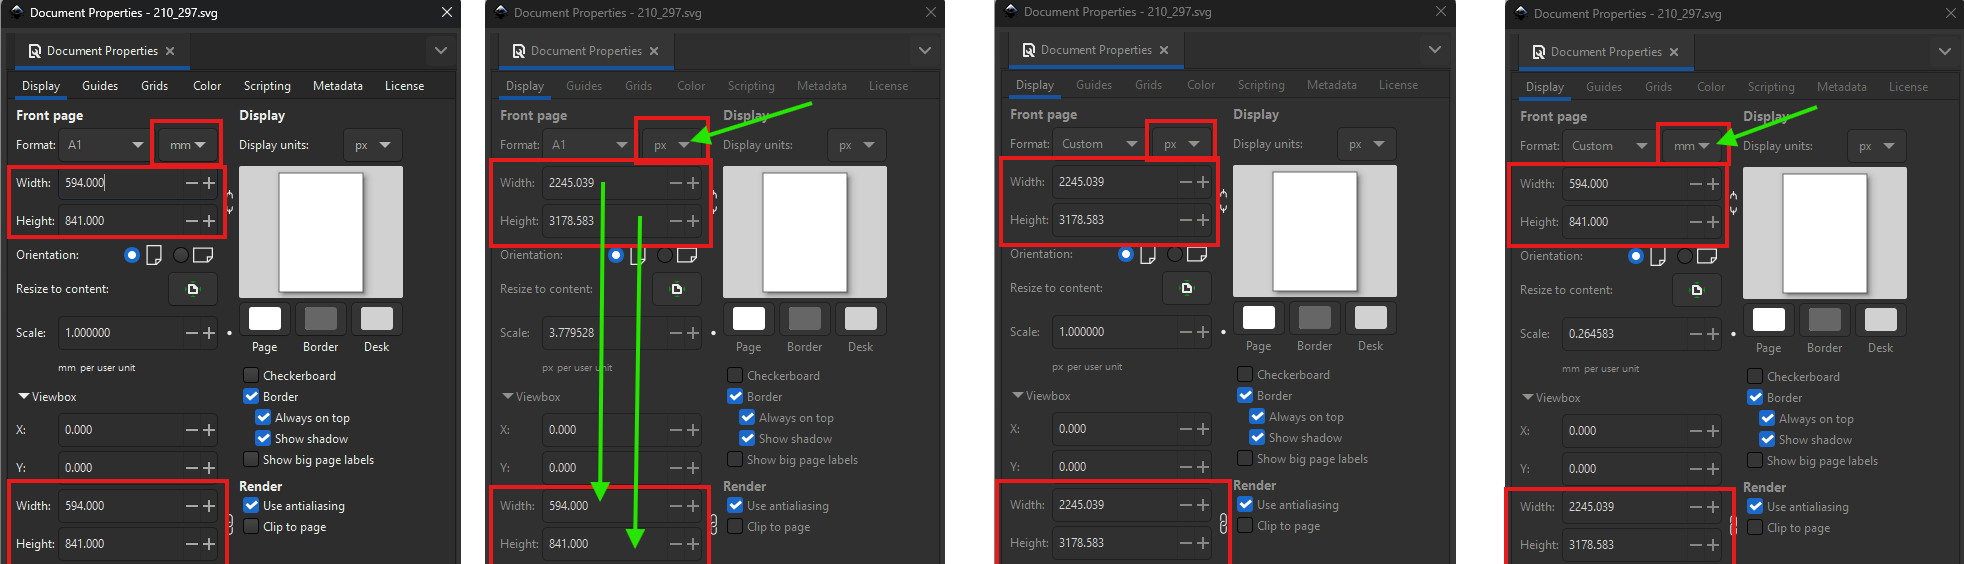
Instead of multiplying, you can also follow these steps:
- After setting the SVG width and height in mm, change it back to pixels (px).
- Copy the new values of the SVG width and height and use them for the Viewbox width and height.
- Change the measuring system of the SVG back to mm.
Now that you have properly configured your svg dimension and the viewbox dimensions, it is time to edit the content of the SVG to create the layout of your desired watermark.
4.3 Scalable Templates
Please refer to https://windchill-extensions.ptc.com/kb/articles/scalable-template.
5. Adding Business Information to a Template
In many cases it is required to stamp some business specific information to the PDF. For this purpose we provide a set of keys that translate to information that is stored in Windchill. Please refer to the following article for information on the different available business keys: https://windchill-extensions.ptc.com/kb/articles/extension-business-object-key
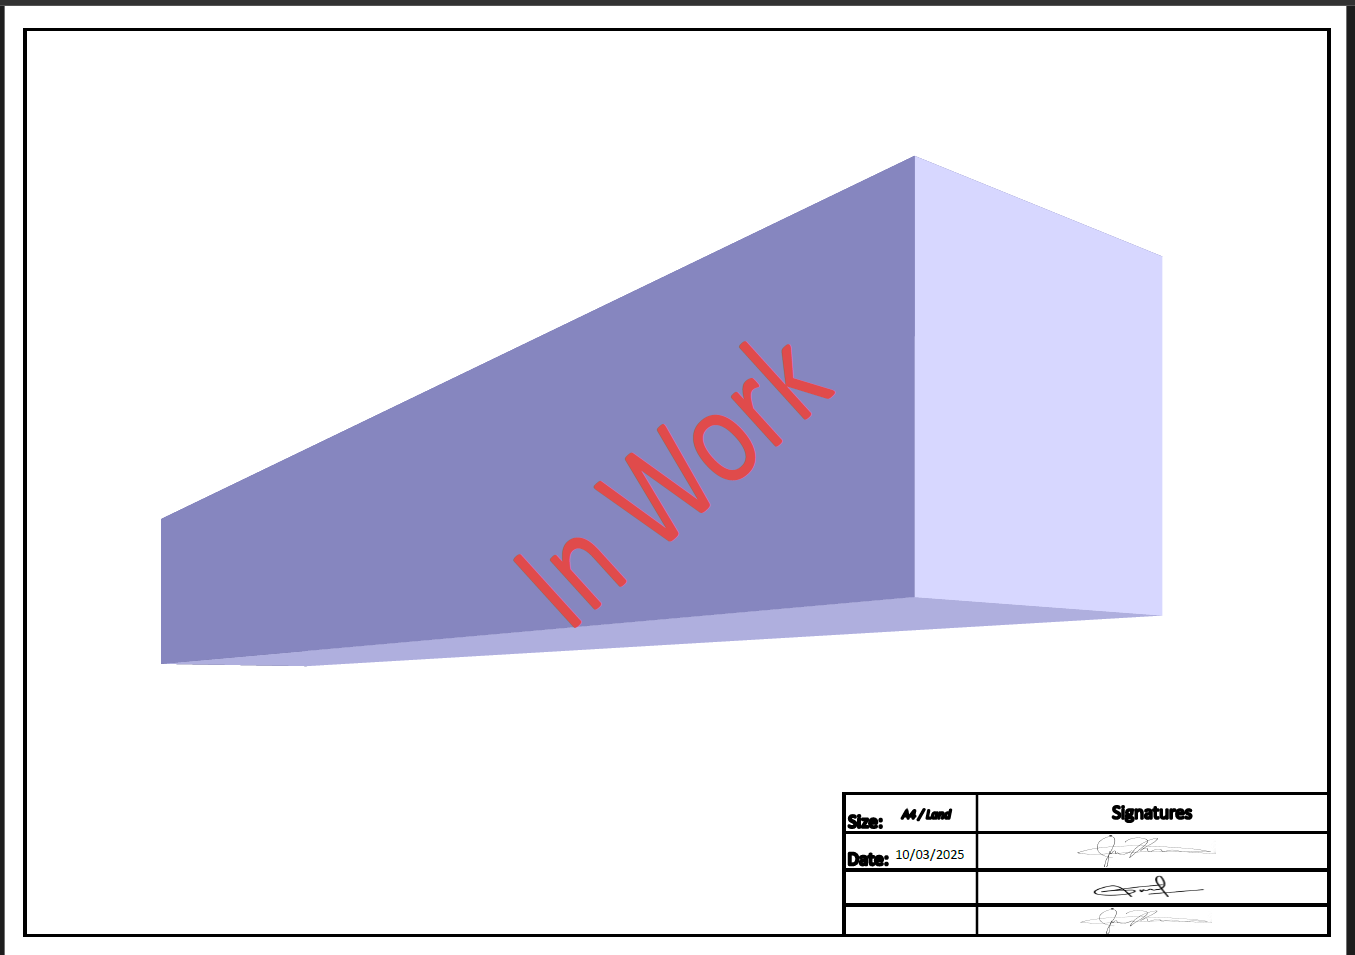
The image below shows how the out of the box statefooter template looks like:

5.1 Adding Windchill User Signatures
So far, when stamping data related to workflow tasks (Approvers, Reviewers…), only the userid or user name of a user could be stamped. Since Watermark 4.1, it is possible to stamp the user signature.
The idea is to use a placerholder image in the svg template which will be replaced by the actual signature of the user. To identify which users signature needs to be used, a custom attribute (data-wex-src) needs to be defined for the image. In the next example we will create a template that stamps the user signatures to the signature block of a drawing.
5.2 Full Watermark Template Example
Before starting with the example, I want to clarify that this guide is not an Inkscape usage guide, so I will not go in depth in Inkscape functionalities.
Step 1
Open a new document in Inkscape and configure the Document Properties as defined in section 4.2.2. Configuring SVG Size (This example template will target A4 Landscape drawings)
Step 2 (Optional)
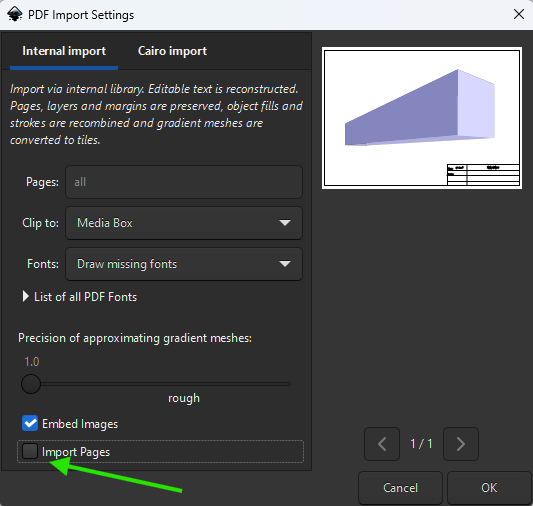
To align the signature placerholder images with the Signature Block, we can import a sample PDF containig the Signature Block into Inkscape (File > Import… )
After choosing the PDF we want to import, make sure to uncheck the Import Pages checkbox. This will import the PDF as a new Layer into Inkscape’s document.
 Once imported, align it with the SVG document, like so:
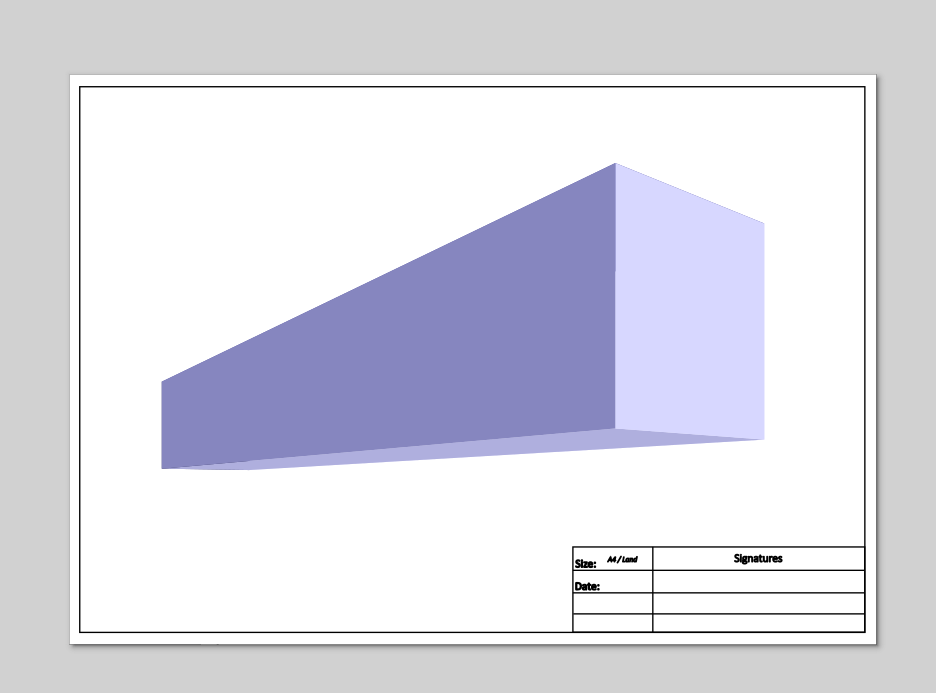 This will make the positioning of the watermark/stamp element easier.
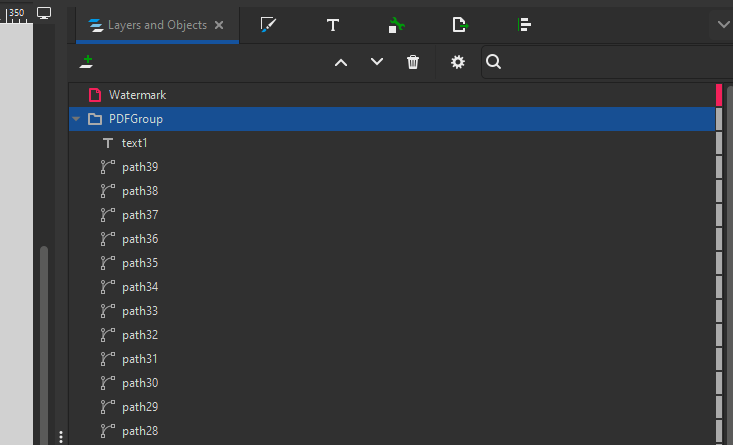
The imported PDF is added as a series of glyphs and shapes contained in a layer or group into the svg document. For the watermark data another layer will be used. In the image below you can see a group called PDFGroup which contains the PDF data and a layer called Watermark which will be used to add the watermark content. (Note that the name of the groups and layer are not the default ones and have been changed for this example, we recommed you doing the same).
Step 3 - Adding a centered splash and date
Next, we will add the first piece of business data into the watermark template. In this particular case, I will use a key that maps to the display text of a Windchill LifeCycleState + a key to display the current date.
State Key: ${statedisplay}
Current Date Key: ${now?string[“dd/MM/YYYY”]}
The Watermark engine uses Apache Freemarker as the template engine which translates keys to their actual values.
By default, keys use the syntax: ${<key_name>}.
You can specify a default value, in case the key doesn’t exist, like so: ${<key_name>!"<default_value>"}
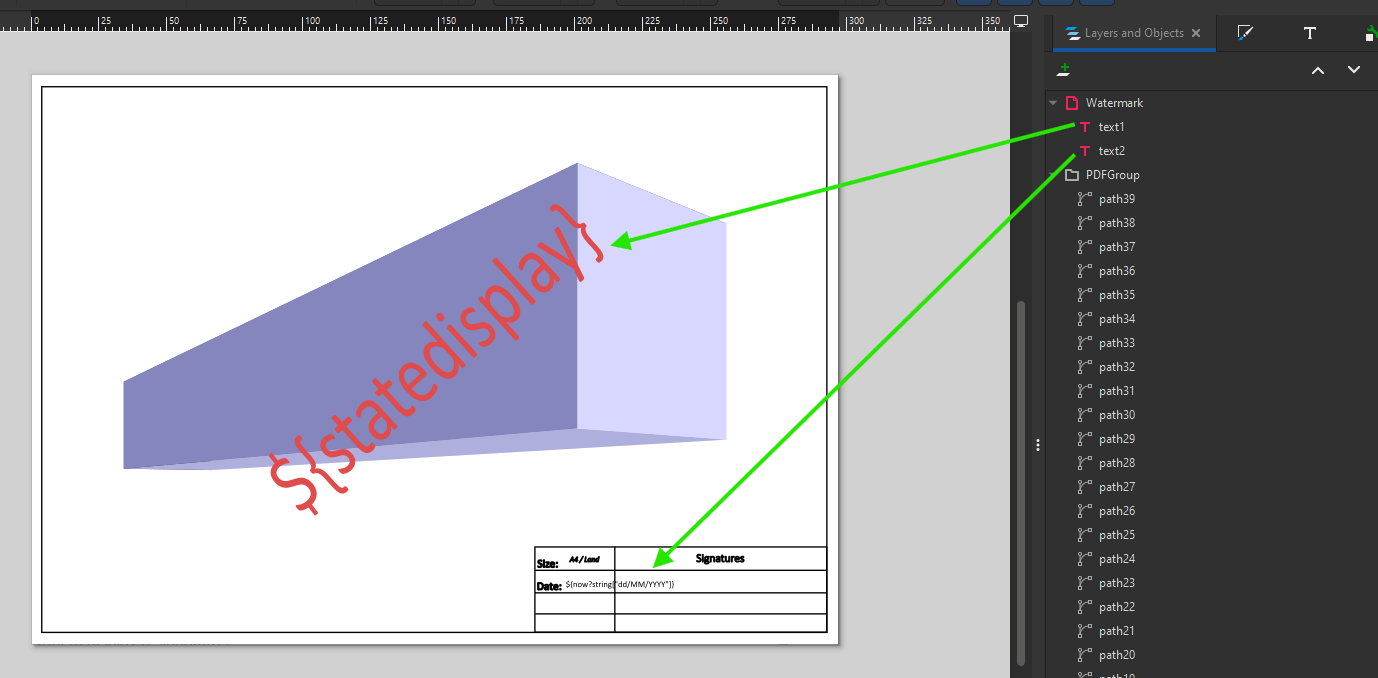 As you can see in the image above, two new nodes text1 and text2 were added to the Watermark layer. You can change the name of the nodes if you like to identify them better.
Step 4 - Adding user signatures
As mentioned before, to stamp the user signatures, we will use a placeholder image when creating the svg which will later be translated into the actual signature image. You can use any image as the placeholder; the smaller the better. For this example we will use this one (I recommend you downloading this image and use it too!):

In this example we want to display 3 signatures:
- The user that created the template. (key: creator-signature)
- The user that Completed the last Change Notice.(key: changetaskwfusersignature@Complete_Change_Notice_Task)
- The user that reviewed the last Change Notice. (key: changetaskwfusersignature@Review_Change_Notice_Task)
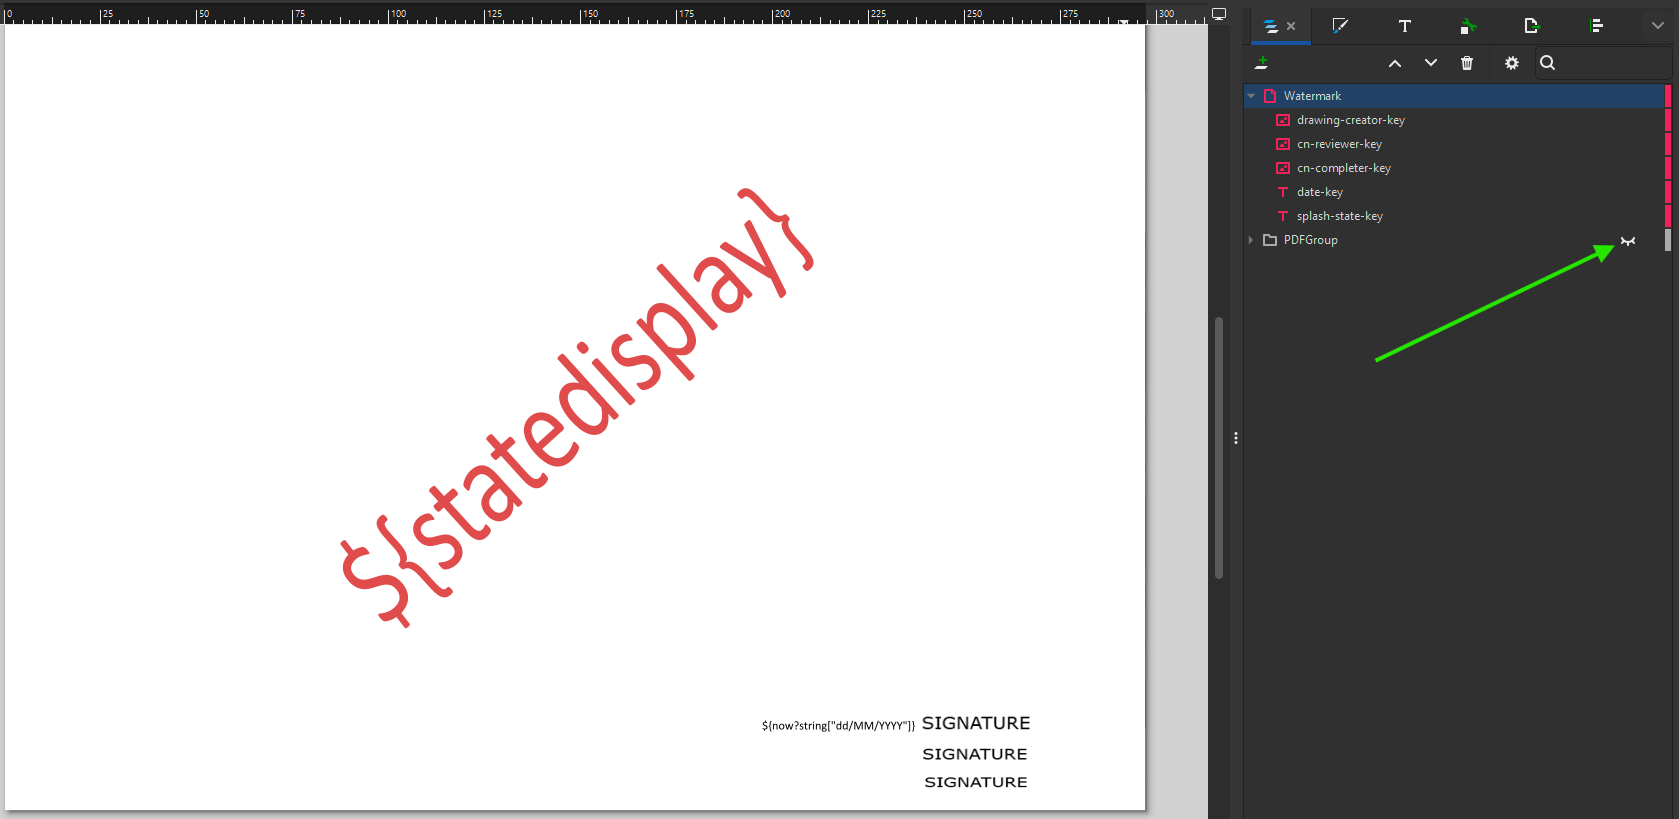
After adding the placeholder images, this is how the template looks like:
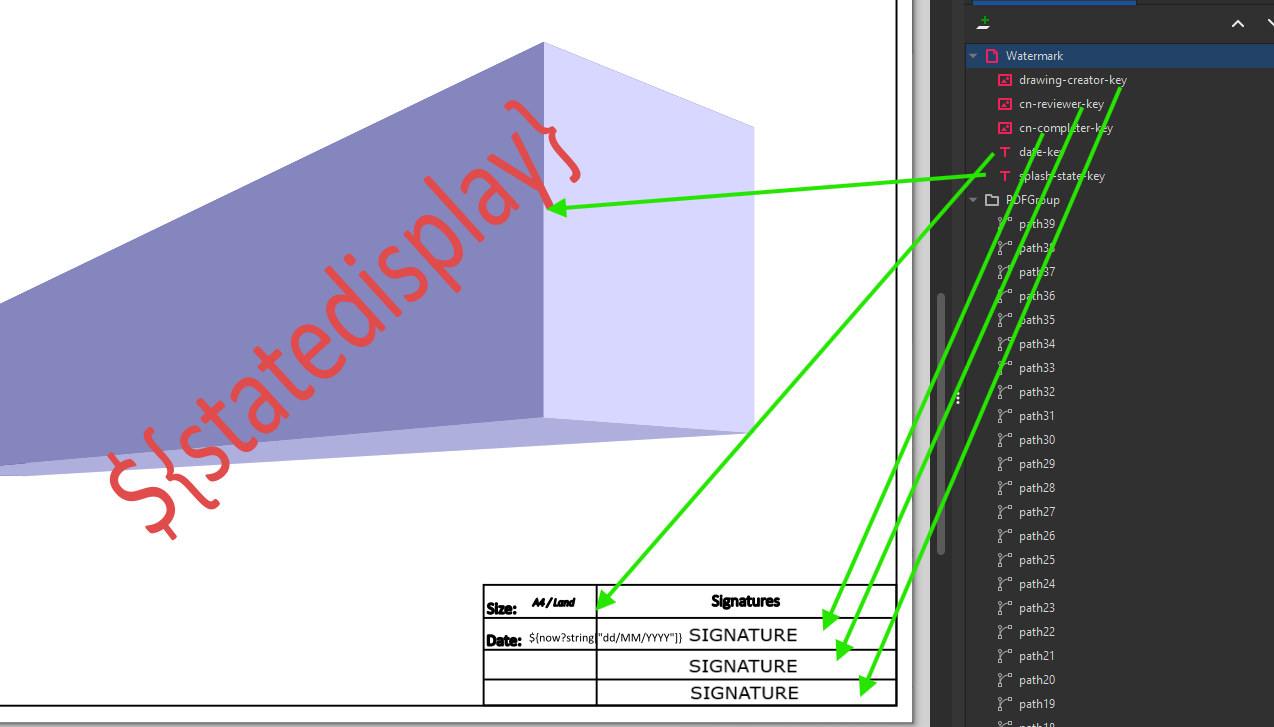 If you check the right side of the picture, you can see I added a descriptive name to each of the nodes under the Watermark layer. This is very helpful to identify the elements when opening the svg file in a text editor. In fact, now we need to edit the svg in a text editor to define what the placeholder images have to be replaced with.
Step 4.1 Setting the image signature keys
Important: Before editing the svg file in a text editor, make sure to save the file in Inkscape and close Inkscape, then edit it in the text editor and once finished open it back in Inkscape if necessary. Inkscape doesn’t recognize the changes you do on a text editor until you reopen the file. This means that if you have svg file open at the same time in both Inkscape and Text editor, do some editing in the text editor, save and then save the Inkscape file, the text editor changes will be ignored by Inkscape, since it is not aware of the changes
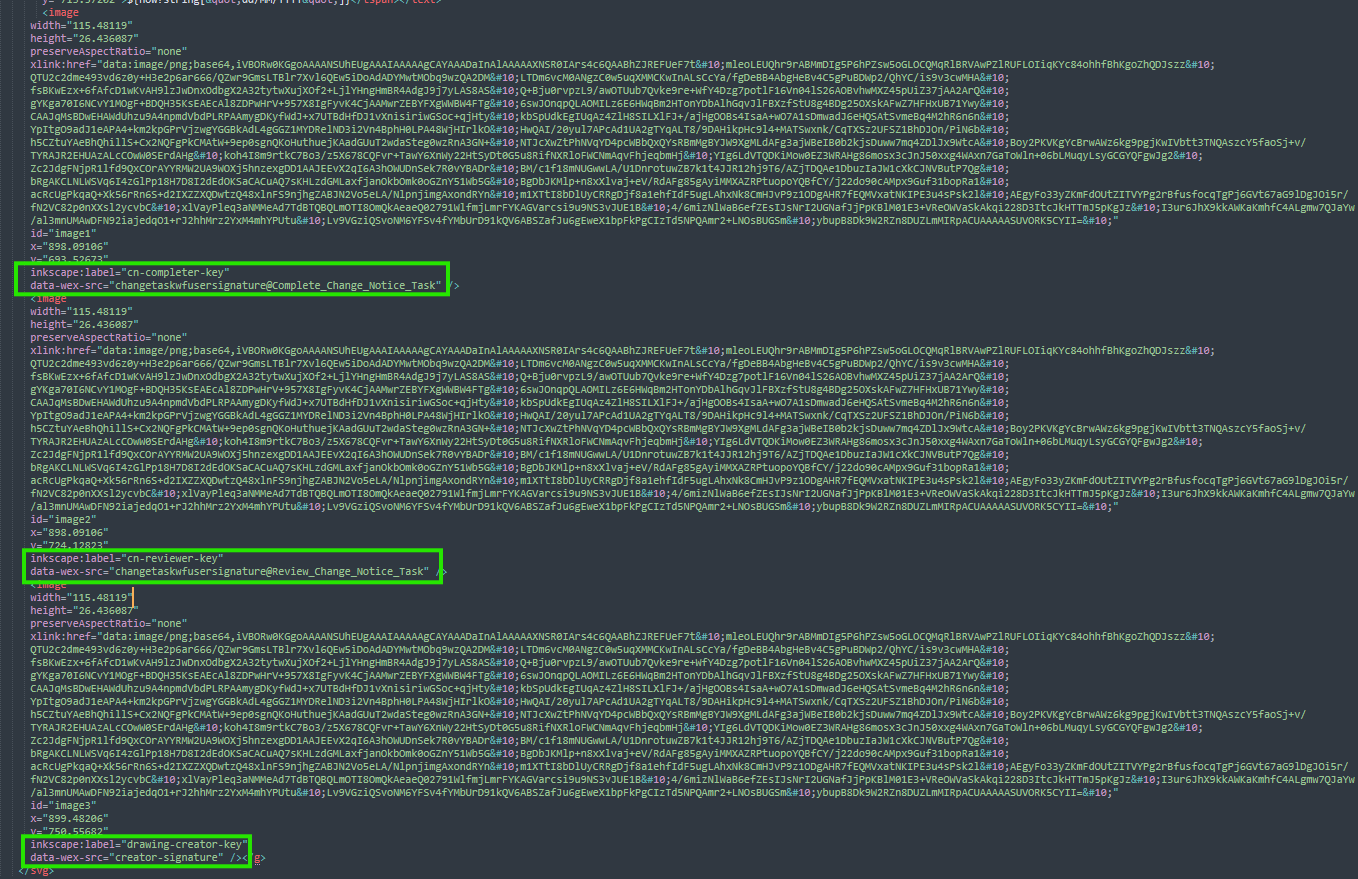
Open the file in your preferred text editor (I will use Sublime Text Editor) and try to find the images node that we added previously. You will see each image node has an attribute inkscape:label which corresponds to the name I have given to the nodes in the Inkscape editor.
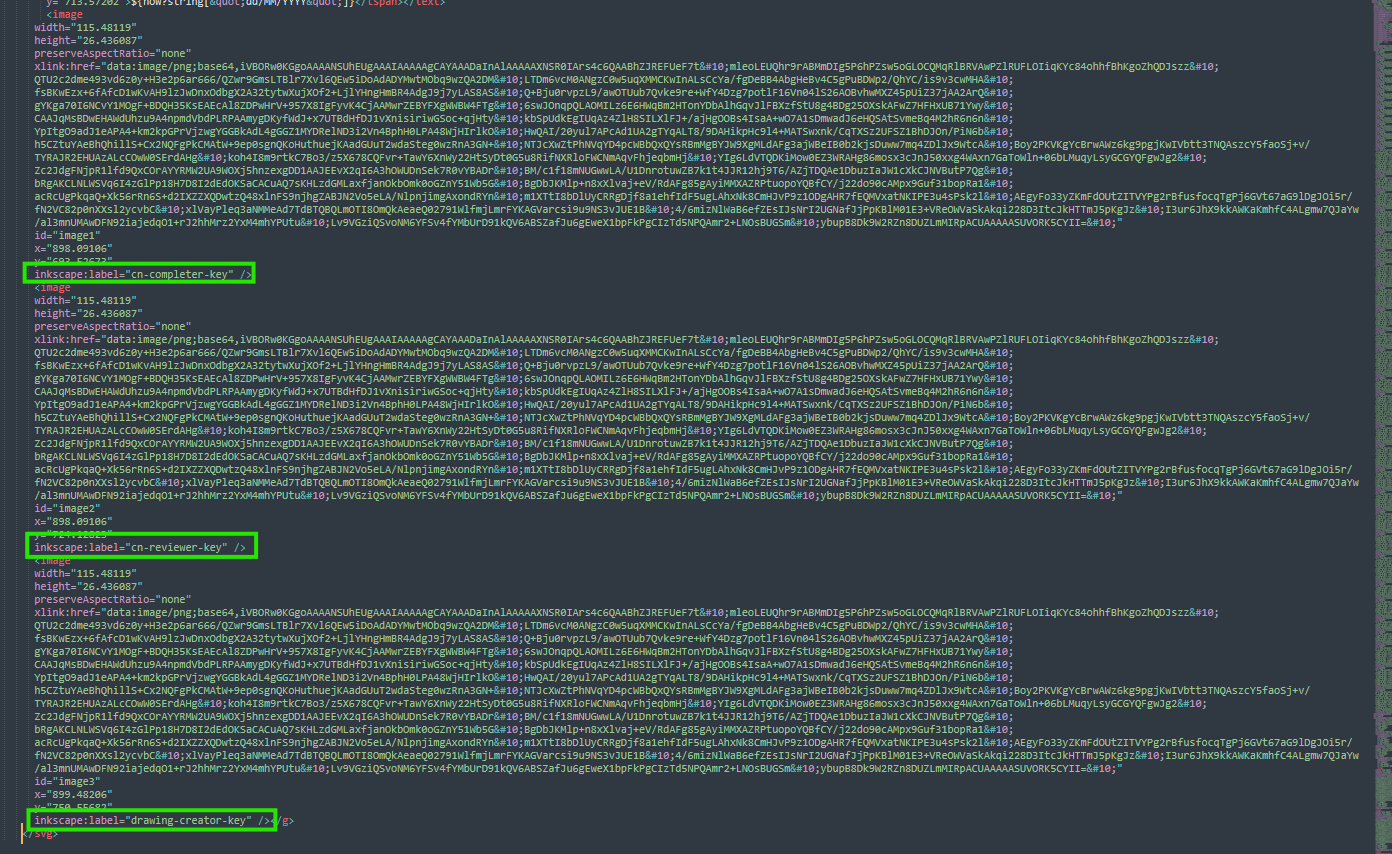 Once we have identified each image tag it is time to add the custom attribute data-wex-src that will tell the watermark engine what it should replace the image with. In the image below you can see how we added the custom attribute and its corresponding value.
Note: The value of the attribute does not have to be surrounded with ${<key>} as with the normal keys.
Once we have identified each image tag it is time to add the custom attribute data-wex-src that will tell the watermark engine what it should replace the image with. In the image below you can see how we added the custom attribute and its corresponding value.
Note: The value of the attribute does not have to be surrounded with ${<key>} as with the normal keys.
Step 5 Let’s Test the Template
If you did the optional Step 2 in which we imported the PDF into the SVG, now that we have finished the template, we can either hide or remove the PDF group completely. My personal recommendation is to hide it if you plan to further modify the template and once you’re happy with the result remove it. Removing the PDF group layer will make the svg significantly lighter, specially if the PDF had a lot of content.
At this point, we have finished our template. Now let’s upload the SVG into Windchill and test it.